Italy’s secret condiment: Pickled Green Tomatoes

My mom has been making pickled vegetables for as long as I can remember, including these Pomodori Verdi Sott’Olio.

As a teen, my sandwiches were layers of prosciutto, mortadella, and mozzarella cheese with a helping of mom’s pickled vegetables stuffed into a crusty bun. Since then, I’ve helped my mom make her pickled vegetables. The type of vegetable always varied, from eggplant and asparagus, to today’s recipe: green tomatoes.

img_5937-edit2

Writing her recipe out now, I’ve realized two things:

1. It’s a lot easier to make than I remember
2. It’s intuitive and doesn’t fit nicely into exact measurements

How much oil do you need? “Enough to cover the vegetables”. What about salt? Vinegar? “You know, enough to cover everything”. It’s very much an authentic, old-school Italian recipe.

img_0036

While my mom and I were fine tuning the recipe, she called her sister in Italy to make sure I had the best possible recipe. We tapped straight into the source: the modern Italian home cook! Along the way we even found out that some in Italy substitute white wine for water. Who knew?

Keep in mind that the “exact” ingredients I list below are approximations and will vary. The classic amount is “enough to cover”, but that can change depending on the width of the bowl and jar you’re using. It’s better to add a little too much salt/vinegar/water/oil than the opposite.

img_5797

Find a cool, dark place to store these when finished and you can enjoy them year round in sandwiches and hamburgers, or with different appetizers. Try it on toast with ricotta cheese and roasted ripe tomatoes. Yum.

Don’t be intimidate by all those recipe steps below! Most of it is letting the ingredients sit around (they’re pickling) and draining liquid once in a while.

**Carla’s tip: You can change the seasoning to your preference. Experiment with fresh rosemary or thyme and double or reduce the garlic. These also make unique gifts for the foodie in your life! (Try using 1/2 cup jars).

img_5984

Pickled Green Tomatoes

  • Servings: approx 4 cups
  • Print

Ingredients

  • 8 cups (2L) sliced green tomatoes
  • 1/4 cup (60 mL) coarse salt (approx)
  • 3 cups (750 mL) white wine vinegar (approx)
  • 1 cup (250 mL) water
  • 2 or 3 small green, red or yellow peppers and 1 carrot chopped, optional
  • 2 cups (500 mL), olive oil (approx)
  • 6 garlic cloves, cut in slivers or whole
  • 2 tsp (10 mL) dried oregano
  • 2 Tbsp (30 mL) cracked black pepper

img_6016-2

Instructions
It’s not as bad as it looks!

  1. Using a sharp knife trim off any blemishes from tomatoes. Slice the green tomatoes into roughly 1/2-inch slices.
  2. Lay out tomatoes in layers in a large ceramic or glass bowl, sprinkling salt in between each layer.
  3. Cover the tomatoes with a plate and a clean kitchen towel and leave to stand in a cool, dark place for 24 hours.
  4. After those 24 hours, take the tomatoes out of the bowl drain them in a colander. Squeeze tomatoes gently and leave in colander for about 20 minutes more, or until most of the liquid has been drained.
  5. Get out another bowl and mix together vinegar and water. Place tomatoes (and green pepper and carrots, if using) into the vinegar/water bowl, making sure the liquid covers all of the vegetables. Cover with a plate and a dishcloth and set aside for approximately 12 hours.
  6. After these 12 hours, drain the liquid from the tomatoes/vegetables/vinegar/water bowl using a colander.
  7. Keep the tomatoes/vegetables in the colander and place a small plate over them, so that the vegetables are being pressed down (and drained through the colander in the bottom.) Add some weight to the top of the small plate so it adds extra pressure to the pickled veggies (I used a brick). Leave it like this for 3-4 hours.
  8. In a separate bowl, mix olive oil, garlic, oregano and cracked peppers. Blend with a spoon and get ready to pack everything up into jars!
  9. Once the veggies have finishes their 3-4 hour colander draining, stuff them into sterilized preserving jars (1 cup/ 250 mL jars are a good size). Pour the oil mixture over the green tomatoes, leaving 1/2 inch (1 cm) head space.
  10. Make sure that all vegetables are covered with oil mixture and seal tightly.
  11. Don’t be afraid to push the vegetables into jars firmly and remember what I said: these measurements aren’t exact! You might need a little less more more of the olive oil mixture to make sure the veggies are covered and fit well in the jar.
  12. Keep the jars in a refrigerator or cool dark room until ready to use. When you remove vegetables to eat, make sure all vegetables left behind in the jar are covered with oil, adding additional oil if necessary. Keep for 6 months.

img_6000-2


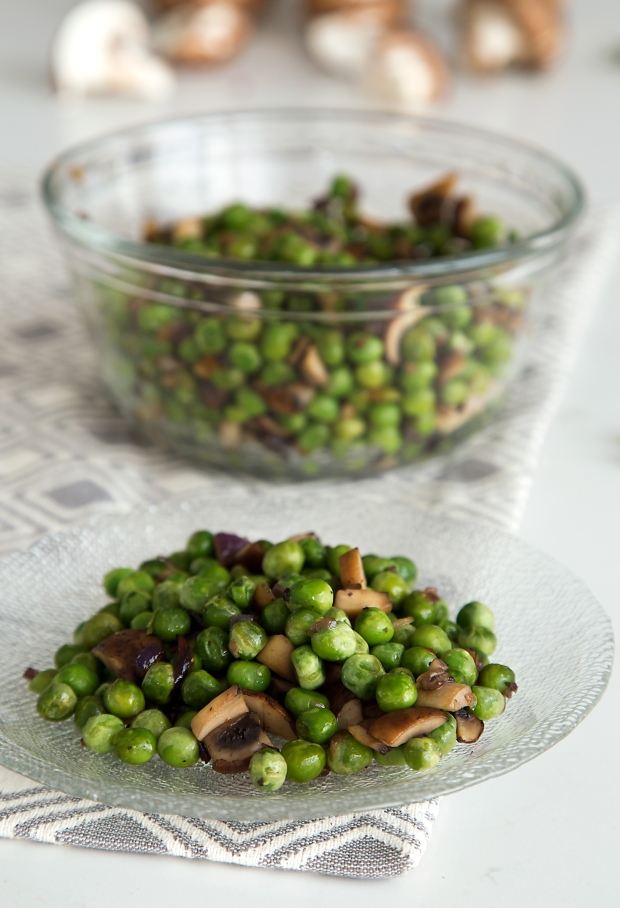
Italian Peas and Mushrooms

No matter how many summer peas we picked from the vegetable garden as kids, there never seemed to be enough for mom to make her Italian peas and onions. It was mostly my siblings and I to blame, sneaking freshly shelled peas when no one was looking. I’m not sure mom minded–we were getting our vegetables either way!

img_9298

When peas were out of season, mom used frozen peas which are flash frozen at the height of their freshness. They’re not the same as freshly picked, but still tasty, nutritious, and sweet.

img_9215-no3

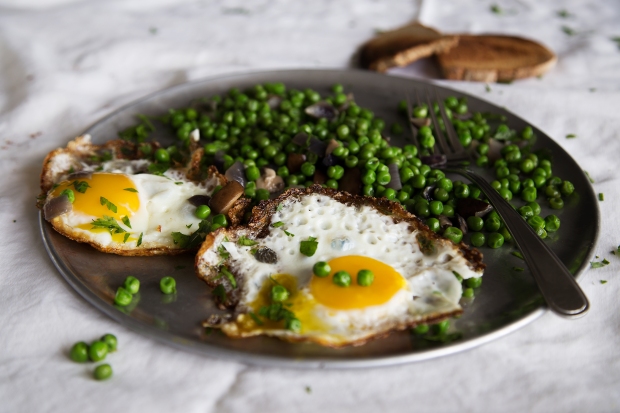
For a quick after-work dinner, add a fried egg or two to this recipe for added protein. Throw in a few slices of toast and you might as well be back in the Italian countryside. Buon appetito!

*Carla’s Tip*: Chop onions and mushrooms the same size, so that you can taste and see the peas, onions and mushrooms on your fork. Adjust cooking time to how small or large you cut the vegetables.

img_9230

Italian Peas and Mushrooms

  • Servings: 2-3 as main meal, 4-6 as side dish
  • Print

Ingredients

  • 3 cups (750 mL) peas, fresh or frozen
  • 3 Tbsp (45 mL) olive oil
  • 1 red onion, diced
  • 6 to 8 brown cremini mushrooms, chopped
  • 3 to 4 sprigs fresh thyme, or your favourite herb
  • Salt and pepper to taste

Instructions

  1. If using frozen peas, place them in a colander under cold running water until defrosted; drain and set aside.
  2. In a large skillet, heat oil over medium heat. Add the onion and cook for about 3 to 4 minutes or until softened. Add the mushrooms and cook until softened and vegetables golden, 5 to 6 minutes. Add the peas, herbs, salt and pepper to taste.
  3. Cook for 2 to 3 minutes further, stirring to scrape up any brown bits from the bottom of the pan and peas are tender. I like to cover peas and set aside while I prepare the rest of the meal, which gives time for the flavour of vegetables and seasonings to develop. You can also serve immediately.

img_9251

Stuffed Artichokes

Carciofi Ripieni

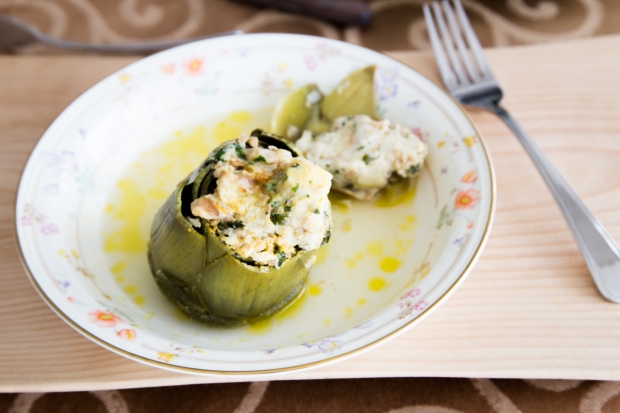
Stuffed artichokes were an early Spring staple in my house growing up. My mom cooked them in a flavourful broth with seasonal peas or fava beans. They’re stuffed with my egg and cheese recipe, an old favourite (see Pallotte cacio e uova).

IMG_9880

The hardest part of this recipe is preparing the artichokes. The recipe below provides helpful, straightforward instructions. Don’t be afraid to pull back as many of the other leaves of the artichokes and cut off any prickly leaf tips. You will be rewarded with beautiful green/yellow tender artichokes that can be cooked stuffed in this recipe or plain if you prefer. Buy a few extra, while they are in season, and cook and store them in your refrigeration ready to accompany any meal as a side dish or add them to your salad.

IMG_9840

The large and medium size artichokes you are seeing in the markets at this time are arriving from California. Ontario artichokes will arrive later in the year, closer to the fall.

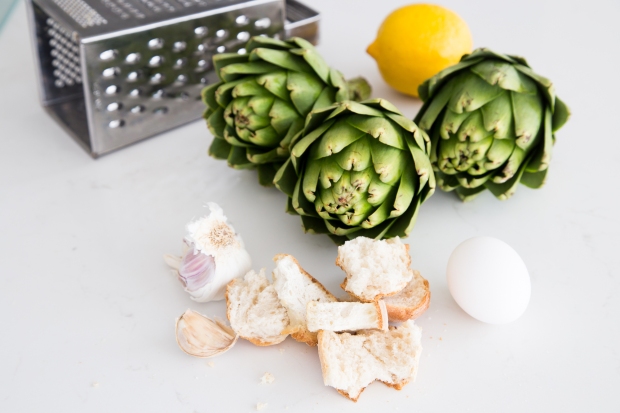
*Carla’s tip: Artichoke leaves brown quickly once you start trimming them. Rub artichokes with half of a cut lemon periodically and place them in water with lemon juice while preparing them for this recipe. Also, prepare the stuffing and broth before cleaning the artichokes, to reduce the time that the artichokes might be sitting around and browning.

IMG_9859

Stuffed Artichokes

  • Servings: 4
  • Print

Ingredients

  • 1/2 slice French or Italian bread, (about 1/2 inch (1 cm) thick) torn into  pieces
  • 1/2 cup (125 mL)  whole milk
  • 2 eggs
  • 1/2 cup ( 125 mL) Parmesan cheese, finely grated
  • 1/2 cup (125 mL) fresh or lightly toasted, breadcrumbs
  • 2 Tbsp (30 mL) finely chopped fresh parsley
  • 1 small clove garlic, minced
  • 4 cups (1 L) vegetable, chicken stock or water
  • 2 Tbsps (30 mL) olive oil
  • 1/4 bunch of fresh parsley sprigs
  • 2 cloves garlic, peeled and whole
  • 2 Tbsps (30 mL) white wine (optional)
  • 4 medium artichokes, rinsed
  • 1 large lemon, cut in half
  • Salt and pepper to taste
  • IMG_9919

Instructions

  1. In a small bowl toss the torn bread with the milk and set aside for about 5 minutes. Using your hands, squeeze some of the milk from the bread (the bread should be somewhat soggy), reserve the milk. Set aside.
  2. In a separate bowl, whisk the eggs in a large bowl with a fork.  Add the cheese, breadcrumbs and milk bread to eggs, one at a time, stirring between additions.  Batter should be light and creamy, add about 1 to 2 Tbsps (15 to 30 mL) reserved milk to make a moist, but not soupy, batter (the mixture should stick together when you form a ball). Stir in the  parsley, garlic and salt and pepper to taste. Loosely cover and set aside for 20 minutes in refrigerator or until ready to stuff artichokes.
  3. In a 2 or 3 quart saucepan, or a saucepan that will tightly fit 4 stuffed artichokes sitting upright (you would like them to remain upright so that the stuffing does not fall out), place stock, oil, parsley, garlic, white wine (if using) and salt and pepper to taste, cover, and bring to a rolling boil over high heat. Reduce the heat to medium-low maintaining a low boil.
  4. Using a serrated knife, cut about 1-inch from top of artichoke and remove the stem so that artichoke will stand up. With cooking scissors, remove pointy thorns/spikes of artichokes. Remove and discard as much of the outer tough leaves of artichokes until you get to the thin, yellow-green inner leaves.
  5. Gently spread out the outer leaves of the artichokes until you get to the centre, remove the centre leaves from the artichokes in addition to silky layer at the bottom of artichoke, where it meets the heart. This should make a space to place stuffing.
  6. Using a spoon, press about 1/4 of the breadcrumb stuffing into each artichoke. Off of the heat, place artichokes with stuffing facing upwards, in saucepan with stock. If stock has reduced, add up to an additional 1 cup (250 mL) of water or add enough water so that liquids reach 3/4 way up artichokes (this will help reduce darkening of outer leaves and tenderize artichokes further). Return saucepan to heat and partially cover, simmer for 25 to 30 minutes, or until hearts are fork-tender. Transfer artichokes to a serving dish, ladle broth over top.


IMG_9980

Esparregado de Espinafres

GREENS, POTATOES, AND EGGS IN GARLIC OIL AND WHITE WINE VINEGAR

Esparregado is a classic Portuguese side dish, typically made with spinach in a cream sauce. This is a heartier version, adding eggs and potatoes to transform it into a full meal.  It’s a unique recipe that was created on a farm in Central Portgual, incorporating all of the vegetables they’d harvested. The recipe now lives on in Toronto, passed onto me from Palmira, the daughter of our original, resourceful farmer.

The vibrant and fresh sauteed green vegetable combination gets an extra kick with white wine vinegar. The eggs also add protein,  ensuring a well rounded meal.

Substitute any green, seasonal vegetable and you’ll make our resourceful farmer proud.  Adjust the cooking time to suit the greens you are using.  Prepare the greens, potatoes, and eggs earlier in the day and toss together a satisfying one-dish meal closer to dinnertime in a matter of minutes.

Sometimes I serve Esparregado with a can of tuna or a few slices of smoked salmon.


Esparregado de Espinafres

  • Servings: 2 to 4
  • Print

Ingredients

  • 8 cups (2L) water
  • 1 tsp (5mL) salt
  • 1 large head broccoli rabe, rough ends trimmed
    about 1/2  inch (1 cm) from base
  • 1 large potato
  • 2 eggs
  • 1/4 cup (60 mL) olive oil
  • 6 to 8 cloves garlic, minced
  • Fine salt and coarsely ground
  • pepper, to taste
  • 4 to 6 Tbsp (60 to 90 mL) white wine
  • vinegar or cider vinegar

Instructions

  1. In a large saucepan or Dutch oven, combine the water and salt.  Bring to a boil over medium-high heat and add the broccoli rabe.  Return the water to a boil and simmer for about 4 minutes, just until the rabe is bright green and tender. Drain and set aside to cool slightly.  When cool enough to handle, squeeze out as much water as possible from the greens and dry on kitchen towels to remove any excess water  Using a sharp knife, chop finely.  Transfer to a large bowl and set aside.
  2. In a saucepan, cover the potato with water.  Bring to a boil over medium-high heat and boil for 5 to 10 minutes.  Drain and set aside until cool enough to handle.  When cool, roughly dice and place in the bowl with the greens.
  3. In a large deep saucepan, place the eggs in a single layer.  Pour in enough cold water to come at least 1 inch (2.5 cm) above the eggs.  Cover and bring to a boil over high heat.  As soon as the water comes to a boil, remove the pan from the heat.  Let stand, covered, for 20 minutes.  Drain under cold running water for 2  minutes.  Peel the eggs.  Chop and add to the potato and broccoli rabe.
  4. Using a fork, mix all of the chopped ingredients together — the mixture should not be mashed (it should be retain some rough texture).
  5. In a large frying pan or Dutch oven, heat the oil over medium-low heat.  Saute the garlic until golden, softened, and aromatic, 6 to 8 minutes.  Stir frequently.  Add the broccoli rabe mixture and toss to coat evenly; cook until warmed through, about 3 minutes.  Add salt and pepper to taste.  Remove from the heat and add vinegar, to taste.  Serve warm over cornbread toast.